Author: leonelvturcios

  • Hydraulic Cement for Basement Cracks: When It Works and When It Doesn’t

    Hydraulic Cement for Basement Cracks: When It Works and When It Doesn’t

    Hydraulic cement is one of the most popular DIY products for basement crack repair — and one of the most misunderstood. It can stop an active water leak in minutes, but it is not a permanent waterproofing solution. This guide explains exactly when to reach for hydraulic cement, when to skip it, and how to apply it correctly.

    What Is Hydraulic Cement?

    Hydraulic cement is a fast-setting compound that expands as it hardens, making it effective at plugging active leaks in concrete or masonry. It works by chemically reacting with water during the curing process. Common brands include QUIKRETE Hydraulic Water-Stop Cement and Sakrete Hydraulic Cement.

    When Hydraulic Cement Works

    • Pipe penetrations: Where water pipes or utility conduits enter the foundation wall, hydraulic cement creates a tight seal around the gap.
    • Active cracks with slow seepage: For hairline to 1/4-inch cracks with slow, steady seepage, hydraulic cement can stop water immediately.
    • Cove joint seepage: The joint where the floor meets the wall (cove joint) is a common leak point; hydraulic cement can temporarily seal it.
    • Tie rod holes: Poured concrete walls have tie rod holes from the construction forms. Hydraulic cement fills these quickly.

    When Hydraulic Cement Fails

    The most common DIY mistake is applying hydraulic cement to structural cracks or high-volume leaks and expecting it to last. Here is why it fails in those cases:

    • Structural cracks (stair-step or diagonal): These cracks are caused by soil movement or foundation settling. The underlying movement will re-open the crack around the patch within months or years.
    • High water pressure: Hydrostatic pressure (the force of water-saturated soil pushing against your foundation) will eventually pop hydraulic cement out of a crack if the pressure is significant.
    • Large cracks (over 1/2 inch): Wide cracks indicate structural problems that require professional repair — an epoxy injection system or carbon fiber straps, not hydraulic cement.
    • Horizontal cracks: These signal serious structural failure. Hydraulic cement is not a fix. Call a structural engineer.

    Hydraulic Cement vs. Other DIY Crack Repair Methods

    MethodBest ForLongevityAverage Cost
    Hydraulic CementActive leaks, pipe gaps2–7 years$15–$30 / bag
    Epoxy InjectionStructural crack repairPermanent (if no movement)$100–$400 DIY kit
    Polyurethane FoamActive leaks, flexible cracks5–15 years$50–$200 DIY kit
    Crystalline WaterproofingGeneral wall sealingPermanent$50–$150 / bag
    Masonry SealerMinor moisture, prevention3–5 years$20–$60 / gallon

    Step-by-Step: How to Apply Hydraulic Cement

    What You Will Need

    • Hydraulic cement (QUIKRETE or Sakrete recommended)
    • Cold chisel and hammer
    • Wire brush
    • Shop vacuum
    • Heavy rubber gloves
    • Mixing bucket and trowel
    • Clean, cold water

    Step 1: Prepare the Crack

    Use a cold chisel to widen the crack into a “V” shape or undercut it (wider at the back than the front). This mechanical key locks the cement in place. Remove loose concrete and dust with a wire brush and shop vacuum. The crack should be at least 1 inch deep and 3/4 inch wide for hydraulic cement to bond properly.

    Step 2: Mix the Cement

    Hydraulic cement sets in 3–5 minutes, so only mix what you can apply immediately. Add powder to water (not water to powder) and mix to a stiff, putty-like consistency. Use cold water to slow the set time slightly. Wear heavy gloves — the curing reaction generates heat.

    Step 3: Apply Under Active Leak

    Roll the mixed cement into a cone or plug shape. Hold it firmly against the crack with your gloved hand for 3–5 minutes, maintaining pressure while it sets. For a running leak, you may need to push the plug in and hold it for the full set time. Do not remove pressure until the cement is solid.

    Step 4: Finish the Surface

    Once set, trowel additional hydraulic cement over the plug to create a smooth, slightly feathered finish. Allow to cure for 24 hours before painting or applying any additional waterproofing products.

    After Hydraulic Cement: The Next Step

    Hydraulic cement stops the immediate leak but does not address the root cause. After patching, evaluate whether you need a more comprehensive solution:

    • If the crack is in multiple places or returning, consider an interior drainage system that manages water rather than trying to block it.
    • If you have high hydrostatic pressure (wet soil, high water table), a sump pump system may be necessary.
    • For recurring cracks caused by foundation movement, get a professional evaluation before investing in more materials.

    Cost Expectations

    A 10-pound bag of hydraulic cement costs $15–$30 and covers several linear feet of crack repair. A typical DIY repair for 2–3 cracks costs $30–$75 in materials. If you hire a professional waterproofer to apply hydraulic cement as part of a larger job, material costs are typically included in labor fees of $200–$500 for crack repair.

    See our complete guide to basement waterproofing costs to understand how crack repair fits into the overall investment.


  • How Much Does Basement Waterproofing Cost? Complete 2026 Price Guide

    How Much Does Basement Waterproofing Cost? Complete 2026 Price Guide

    Basement waterproofing costs range from $500 for DIY crack sealing to $45,000+ for full exterior excavation and membrane installation. The gap is enormous — but the right solution for your specific problem is usually far cheaper than the worst case. This guide breaks it all down.

    Basement Waterproofing Cost Overview

    Solution TypeAverage CostBest For
    DIY crack injection$100–$400Single non-structural cracks
    Interior sealers/paint$200–$800Moisture vapor, minor seepage
    Window well drain$500–$2,000Window well water issues
    Exterior grading/drainage$1,000–$5,000Surface water intrusion
    Interior French drain$6,000–$18,000Chronic water, high water table
    Sump pump installation$800–$2,500Active water management
    Exterior waterproofing$15,000–$45,000Severe cases, new construction
    Full crawl space encapsulation$5,000–$15,000Crawl space moisture

    Cost by Region

    Labor and contractor pricing varies significantly by region. Interior French drain systems as a reference point:

    RegionInterior French Drain (full perimeter)
    Northeast (NY, NJ, CT, MA)$10,000–$20,000
    Midwest (IL, OH, MI, IN)$7,000–$14,000
    Mid-Atlantic (PA, MD, VA)$8,000–$16,000
    Southeast (GA, NC, SC)$6,000–$12,000
    South (TX, FL, AL)$5,500–$11,000
    Northwest (WA, OR)$8,000–$16,000
    Mountain (CO, UT)$7,000–$13,000

    What’s Actually Driving the Cost

    Labor (50–70% of Total Cost)

    Interior waterproofing is physically intensive — jackhammering concrete, excavating, hauling debris, and re-pouring. In high-labor-cost markets (New York, California, Seattle), the same job can cost 40–60% more than in lower-cost regions.

    System Size and Perimeter Length

    Per-linear-foot pricing for interior French drains typically runs $50–$150 per foot installed. A 1,500 sq ft basement with a 160-foot perimeter costs substantially more than an 800 sq ft basement with an 80-foot perimeter, even with the same contractor.

    Finished vs. Unfinished Basement

    A finished basement requires tearing out drywall, flooring, and potentially built-in fixtures before waterproofing — adding $1,000–$5,000 in demo costs, plus whatever you spend on restoration afterward.

    Getting Fair Contractor Quotes

    The waterproofing industry has a well-known reputation for aggressive sales tactics and inflated pricing. Protect yourself:

    • Always get 3 quotes. The spread between the highest and lowest quote for the same job is often 50–100%.
    • Get quotes from local contractors, not just national brands. Companies like Basement Systems, BDry, and TerraShield spend heavily on marketing and typically price 20–40% higher than quality local waterproofing companies.
    • Ask for itemized quotes. “Complete waterproofing system: $12,000” tells you nothing. Ask for per-linear-foot pricing for the drain, sump pump model and cost, discharge pipe scope, and warranty terms.
    • Don’t let them pressure you to sign same day. A contractor who won’t give you time to get competing quotes is a contractor to avoid.
    • Check reviews and licenses. Verify the contractor’s state contractor license, check the BBB, and read Google reviews from the past 12 months.

    Does Homeowners Insurance Cover Basement Waterproofing?

    Generally, no. Standard homeowners insurance covers sudden and accidental water damage (a burst pipe, for example) but not gradual water intrusion from outside — which is what basement waterproofing addresses. Flood insurance (through NFIP or private carriers) may cover some basement flooding from external events, but not seepage from groundwater.

    Some homeowners have had partial success filing claims when a specific weather event (named storm, flash flood) caused identifiable sudden damage. Document everything with photos before any repairs.

    For more on the hiring process, see our guide to choosing and vetting a waterproofing contractor.

  • Basement Humidity Levels: What’s Normal and When to Act

    Basement Humidity Levels: What’s Normal and When to Act

    High humidity is the most overlooked basement moisture problem. Unlike a visible leak, elevated relative humidity causes damage silently — rotting wood, growing mold, and corroding metal — before you ever see or smell anything unusual.

    What Is “Normal” Basement Humidity?

    The target relative humidity (RH) range for a basement is 30–50% year-round. Here’s what happens outside that range:

    RH LevelConditionTypical Issues
    Below 30%Too dryWood shrinkage, cracking, static electricity
    30–50%IdealNo moisture issues
    50–60%ElevatedDust mites thrive, slight mold risk
    60–70%HighActive mold growth likely
    Above 70%DangerousRapid mold, wood rot, pest attraction

    Seasonal Patterns

    Basement humidity varies significantly by season in most U.S. climates:

    • Winter: Often drier (cold air holds less moisture). If you have a high-efficiency furnace exhausting through the basement, it pulls air in from outside, which is cold and dry.
    • Spring: Humidity rises as snow melts and rain saturates the soil. Basement humidity can spike to 70–80% during April–May in northern states.
    • Summer: Peak risk. Warm, humid outdoor air enters the basement and cools, dramatically raising relative humidity. Opening basement windows in summer makes this worse, not better.
    • Fall: Usually improving, but heavy fall rains can cause spikes similar to spring.

    How to Measure Basement Humidity

    Get a digital hygrometer (also called a humidity meter). Accurate models cost $10–$25 on Amazon. Place it in the middle of the basement, not near a dehumidifier or HVAC vent. Check it during:

    • A dry period (baseline)
    • During or 24 hours after heavy rain
    • A hot, humid summer day (July/August in most states)

    Log the readings for 2–3 weeks to understand your pattern before buying equipment.

    Three Sources of High Basement Humidity

    1. Water Vapor Through the Foundation

    Even a dry-looking concrete foundation wall transmits water vapor from the moist soil outside. This is the primary driver of summer humidity spikes in many basements. You can’t stop it entirely, but interior vapor barriers on walls and a properly sealed slab can reduce it significantly.

    2. Outdoor Air Infiltration

    Warm outdoor air in summer contains far more moisture than the cooler air in your basement. When this warm air enters through cracks, windows, or the door, it cools and the humidity goes up sharply. Counterintuitively, sealing the basement from outdoor air during humid months dramatically reduces humidity levels.

    3. Interior Moisture Sources

    Don’t overlook sources inside the basement: an unvented clothes dryer, a leaking hot water tank, standing water in a sump pit, or even a large number of plants can contribute meaningfully to basement humidity.

    The Fix: Dehumidifier Sizing Guide

    A properly sized dehumidifier is the most cost-effective solution for high basement humidity when there’s no active leak. Sizing is based on square footage and severity:

    Basement SizeModerately Humid (50–60%)Very Humid (above 60%)
    500 sq ft30-pint unit50-pint unit
    1,000 sq ft50-pint unit70-pint unit
    1,500 sq ft70-pint unit70-pint + second unit
    2,000 sq ft70-pint unitTwo 70-pint units

    Note: Since 2012, pint ratings were recalibrated. A “70-pint” unit sold today is roughly equivalent to a “50-pint” unit sold before 2012. Check AHAM certification labels for actual performance data.

    Energy Cost of Running a Dehumidifier

    A 70-pint dehumidifier running 12 hours/day uses approximately 700–900 watts, costing roughly $1.50–$2.50/day at average U.S. electricity rates. Running one from May through September costs about $225–$375. This is far less than the cost of mold remediation ($1,500–$5,000) or wood rot repairs ($2,000+).

    If you’re dealing with active leaks rather than just humidity, read about interior waterproofing systems as a more comprehensive solution.

  • How to Waterproof a Basement Wall from the Inside: Step-by-Step

    How to Waterproof a Basement Wall from the Inside: Step-by-Step

    Interior basement wall waterproofing is the most common DIY approach to managing moisture — and when done correctly for the right type of problem, it genuinely works. This guide walks you through the complete process, what products to use, and the critical mistakes to avoid.

    When Interior Waterproofing Works (and When It Doesn’t)

    Interior waterproofing is effective for:

    • Moisture vapor transmission through concrete walls (condensation-type problems)
    • Minor seepage through porous concrete or block walls
    • Damp walls without visible active leaking

    Interior waterproofing will not work for:

    • Active cracks with water flowing through them
    • Seepage at the cove joint (wall-floor joint) under hydrostatic pressure
    • Bowing or horizontally cracked walls (structural issue — do not DIY)
    • High water table pushing up through the floor slab

    What You’ll Need

    • Wire brush or angle grinder with wire wheel
    • Concrete patching compound (hydraulic cement for active leaks)
    • Shop vac
    • Masonry waterproofing sealer (DRYLOK Extreme or equivalent)
    • Stiff-bristle masonry brush or sprayer
    • Respirator (N95 minimum), safety glasses, gloves
    • Bucket and mixing paddle

    Step 1: Clear and Inspect the Wall

    Remove everything within 3 feet of the wall. If there’s drywall or paneling, remove it — waterproofing over finished surfaces won’t work. Let the wall dry out as much as possible before starting (2–3 days of dry weather is ideal).

    Inspect the bare concrete or block for cracks, crumbling mortar, efflorescence, and active wet spots. Mark any cracks with chalk so you don’t miss them during prep.

    Step 2: Treat Active Cracks with Hydraulic Cement

    For any crack that’s actively wet or has visible efflorescence (mineral deposits), use hydraulic cement — not regular concrete patch. Hydraulic cement expands as it sets and works even against flowing water.

    Process:

    1. Use a cold chisel to widen the crack to at least 1 inch wide and 1 inch deep, with the back wider than the front (undercut shape) so the patch can’t pop out
    2. Rinse the crack with water
    3. Mix hydraulic cement per manufacturer directions — it sets in 3–5 minutes so mix only what you can apply immediately
    4. Press the cement firmly into the crack, holding it in place for 3–5 minutes until it hardens
    5. Feather the edges smooth

    Step 3: Remove Efflorescence and Debris

    Waterproofing sealers only adhere to clean, bare concrete. Efflorescence, paint, oil, and dust will prevent bonding.

    • Scrub efflorescence with a stiff wire brush. For heavy deposits, use muriatic acid solution (1 part acid to 10 parts water — wear full PPE and ventilate well)
    • Grind or chip off any flaking concrete
    • Vacuum the entire wall surface with a shop vac
    • Dampen the wall with water (most masonry sealers bond best to a damp surface)

    Step 4: Apply the Waterproofing Sealer

    DRYLOK Extreme (available at Home Depot) is the most widely used DIY interior masonry sealer. It’s rated to withstand 15 PSI of hydrostatic pressure — enough for most moisture vapor situations.

    1. Stir the product thoroughly — don’t shake it
    2. Apply with a stiff masonry brush (not a roller) working the product into all pores and pinholes
    3. First coat: work horizontally, then vertically, ensuring complete coverage
    4. Allow to dry 3–4 hours
    5. Second coat: apply perpendicular to the first coat
    6. Pay extra attention to the cove joint at the floor — apply a thick bead at the angle

    Coverage: Approximately 75 sq ft per gallon per coat. A 10×10 foot wall needs about 2.7 gallons for two coats.

    What to Expect After Treatment

    Interior masonry sealer will noticeably reduce moisture vapor transmission and eliminate light seepage through porous walls. However, it is not a permanent solution for high hydrostatic pressure. If you have significant water pressure against the exterior of the wall, the sealer will eventually fail — usually at the cove joint or through new cracks.

    For long-term protection against serious water problems, pair interior sealer with improved exterior drainage (grading, downspout extensions) and consider a professional interior drainage system if seepage returns.

    See our guide to interior French drain systems for more comprehensive solutions.

  • Basement French Drain Cost: What Contractors Actually Charge in 2026

    Basement French Drain Cost: What Contractors Actually Charge in 2026

    Interior French drains (also called interior perimeter drain systems or footing drains) are the most common professional solution for chronic basement water problems. Costs vary widely — and knowing what drives the price helps you evaluate quotes intelligently.

    Average Cost of Interior French Drain Installation

    ScopeLowMidHigh
    Partial perimeter (1 wall, ~25 ft)$2,500$3,800$5,500
    Full perimeter (~100 ft)$6,000$10,000$16,000
    Full perimeter + sump pump$7,500$12,000$20,000
    Full perimeter + battery backup$8,500$14,000$22,000

    Estimates based on U.S. national averages, 2026. Regional variation ±30%. Get 3 local quotes.

    What’s Included in a French Drain Installation

    A professional interior perimeter drain system includes:

    • Sawcutting the concrete floor around the perimeter (typically 12–18 inches from the wall)
    • Excavating the trench to footing depth (usually 8–18 inches)
    • Installing perforated drain pipe surrounded by drainage stone
    • Wall dimple mat or drainage board — channels water running down the wall into the drain
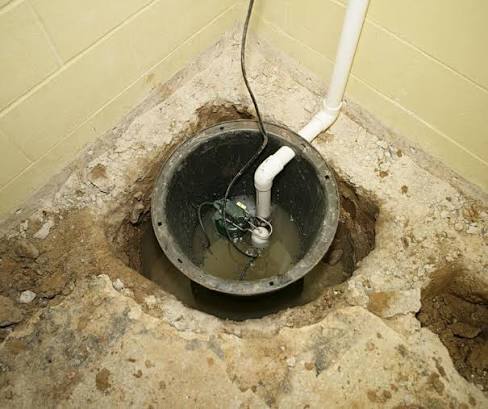
    • Sump pit installation — a liner (crock) installed in the floor with a sump pump
    • New concrete poured over the trench
    • Discharge pipe running from the sump pump to outside the house

    Factors That Raise the Price

    Basement Size and Perimeter Length

    Most contractors price per linear foot of drain installed, typically $50–$150/linear foot. A 1,200 sq ft basement with a 140-foot perimeter costs more than a 600 sq ft basement with an 80-foot perimeter.

    Concrete Thickness

    Older homes often have 4-inch slabs. Newer construction may have 5–6 inch slabs. Thicker concrete = more cutting time and labor.

    Access Challenges

    A finished basement requiring demo first, or a basement with limited access for equipment, adds $1,000–$3,000 to typical quotes.

    Number of Sump Pits

    Large or irregularly shaped basements may need 2 sump pits. Each pit and pump adds $800–$1,500 to the project cost.

    Battery Backup Systems

    A battery backup sump pump ($300–$600 in parts) ensures your basement stays dry during power outages — which often coincide with the storms causing the water problem. Always worth adding if you’re investing in a full system.

    Warranties: What to Ask For

    Reputable waterproofing contractors offer transferable lifetime warranties on their drainage systems. This is important — it protects you when you sell the house. Get the warranty terms in writing before signing anything, and verify:

    • Does the warranty transfer to new owners?
    • What does it cover — just the drain, or also the sump pump?
    • Is there an annual maintenance requirement to keep the warranty valid?
    • What does the company’s history look like — have they been in business long enough to honor a lifetime warranty?

    French Drain vs. Exterior Waterproofing: Which Is Worth It?

    FactorInterior French DrainExterior Waterproofing
    Average cost$8,000–$15,000$15,000–$45,000
    How it worksManages water after it entersStops water before it enters
    DisruptionInterior only, 2–3 daysMajor excavation, landscaping destroyed
    Best forMost residential situationsNew construction, severe cases
    EffectivenessVery high if properly installedHighest, but rarely worth the cost difference

    For most homeowners dealing with chronic wet basements, an interior French drain with a quality sump pump is the most cost-effective permanent solution. See our sump pump guide for help choosing the right pump for your system.

  • Best Sump Pumps for Basement Flooding: 2026 Buyer’s Guide

    Best Sump Pumps for Basement Flooding: 2026 Buyer’s Guide

    The right sump pump is your last line of defense against basement flooding. Choosing the wrong one — too weak, too cheap, or without backup — can mean waking up to feet of water during the exact storm that overwhelmed your system.

    Types of Sump Pumps

    Submersible Pumps (Most Common)

    The pump motor is sealed inside a waterproof housing and sits submerged in the sump pit. Submersibles are quieter, more powerful, and handle debris better than pedestal pumps. They’re the right choice for most residential basements.

    Best for: Permanent installation, basements with regular water issues, pits 10 inches or wider.

    Pedestal Pumps

    The motor sits above the pit on a long shaft, with only the intake at the bottom. Pedestal pumps are cheaper and easier to service, but louder and less powerful. They last longer because the motor stays dry.

    Best for: Narrow sump pits (under 10 inches), budget-conscious applications, very light water intrusion.

    Battery Backup Pumps

    A secondary pump powered by a 12V marine battery that activates when the primary pump fails or the power goes out. This is not optional if you live in a flood-prone area or your basement is finished — power outages and heavy rain are not independent events.

    Water-Powered Backup Pumps

    Uses your home’s water pressure to pump out sump water — no battery needed. Requires adequate city water pressure (at least 40 PSI). Very reliable, but slower than battery backup and not suitable for well water systems.

    Sump Pump Sizing: What HP Do You Need?

    3/4 HP or 1 HP
    Water SituationRecommended HPGPH Capacity
    Light moisture, occasional seepage1/4 HP1,200–1,500 GPH
    Moderate water, average basement1/3 HP1,800–2,500 GPH
    Heavy water, high water table1/2 HP2,800–4,000 GPH
    Severe flooding, large basin5,000–7,000 GPH

    Important: GPH ratings are measured at 0-foot head (flat). Every 10 feet of vertical pipe the pump must push water reduces capacity by 25–35%. Account for your discharge pipe height when sizing.

    Top Sump Pump Recommendations (2026)

    Best Overall: Zoeller M53 Mighty-Mate

    The Zoeller M53 is the industry standard for residential submersible sump pumps — trusted by plumbers and waterproofing contractors alike. Cast iron construction, 1/3 HP motor, handles solids up to 1/2 inch. Rated for 2,580 GPH at 5-foot head. At ~$175–$220, it costs more than big-box alternatives but outlasts them by years.

    Best Budget: Wayne CDU980E

    Wayne’s CDU980E offers solid performance at around $100–$130. Stainless steel construction, 3/4 HP, handles solids up to 1/2 inch. At 4,600 GPH (10-foot head), it outperforms many 1/2 HP competitors. Good choice for light-to-moderate water situations with budget constraints.

    Best Battery Backup: Basement Watchdog BWD12-120

    The BWD12-120 uses a sealed AGM battery that requires no maintenance and installs in an afternoon. Pumps up to 1,800 GPH on backup power. The combined primary + backup unit (BWE) provides comprehensive protection for around $350–$400 total.

    Installation Notes

    • Discharge pipe should be 1.5 inches minimum (match pump outlet size)
    • Install a check valve on the discharge pipe to prevent water from flowing back when the pump stops
    • Discharge at least 10–20 feet from the foundation, sloping away from the house
    • Never discharge into a sanitary sewer or septic system (illegal in most jurisdictions)
    • Plug directly into a GFCI-protected outlet — never use an extension cord

    See our complete sump pump installation guide for step-by-step instructions and maintenance tips.

  • Basement Water Seeping Through Walls After Rain: Causes and Fixes

    Basement Water Seeping Through Walls After Rain: Causes and Fixes

    Water seeping through basement walls after rain is one of the most common complaints from U.S. homeowners — and one of the most misdiagnosed. The water you see on the inside isn’t always coming from the direction you think.

    Why Basement Walls Leak After Rain

    There are four main pathways water takes to enter a basement through or around walls:

    1. Hydrostatic Pressure

    When rain saturates the soil around your foundation, water pressure builds against the exterior wall. Concrete is porous — water under pressure will push through it. The wetter the soil and the longer it stays saturated, the higher the pressure. Clay-heavy soils hold water longest and create the most persistent pressure.

    Signs: Seepage appears at the wall-floor joint (cove joint), or weeps through the face of the wall uniformly rather than at a specific crack.

    2. Cracks in the Foundation Wall

    Even hairline cracks in poured concrete walls provide a direct path for water under pressure. Cracks can result from normal concrete shrinkage during curing (very common, usually not structural), settlement, tree root pressure, or thermal expansion and contraction over years of freeze-thaw cycles.

    Signs: Water enters at a specific visible crack, often with a trail of staining or efflorescence marking the path.

    3. Window Well Overflow

    Basement windows below grade are surrounded by a window well — a curved metal or plastic retaining wall that’s supposed to hold gravel or a drain to manage water. When the drain clogs or the well fills with debris, water pools against the window frame and leaks through.

    Signs: Water appears specifically around or below a basement window. Usually correlates with heavy rain rather than persistent moisture.

    4. Failed Exterior Waterproofing

    Most homes built before 1980 were waterproofed on the exterior with either tar-based coatings or a simple drainage layer. These materials degrade over 20–30 years, leaving the foundation wall exposed to direct water contact.

    How to Diagnose Which Type You Have

    Before spending money on repairs, identify the entry point:

    1. After rain, go to the basement immediately and mark where water appears with chalk or tape. Note the time and how long after rain the seepage starts.
    2. Check the window wells for standing water or debris.
    3. Look for cracks and trace any staining above them to see if it lines up with a specific entry point.
    4. Check the grading outside — if the ground slopes toward the house, water may be pooling at the foundation before soaking in.

    Solutions by Cause

    For Hydrostatic Pressure Seepage

    • Interior French drain system with sump pump (most reliable fix)
    • Exterior excavation and new waterproofing membrane (most comprehensive but expensive)
    • Improve exterior drainage: regrade the yard, extend downspouts, add swales

    For Wall Cracks

    • Polyurethane or epoxy crack injection (DIY-able for non-structural cracks under 1/4 inch wide)
    • Carbon fiber straps or steel I-beams for bowing walls with horizontal cracks
    • Exterior crack repair during excavation for severe cases

    For Window Well Issues

    • Clear the drain at the bottom of the well
    • Add a cover to keep debris and rain out
    • Replace the gravel (should be 3–4 inches deep at minimum)
    • Install a window well drain connected to the interior drainage system

    What Not to Do

    A common mistake is applying waterproofing paint (Drylok or similar) to the interior of a leaking wall. These products can slow moisture vapor transmission, but they cannot withstand hydrostatic pressure. Water will eventually find another path, and the paint will peel. Interior sealers are not a solution for active seepage — they’re a vapor barrier for condensation issues.

    When to Call a Professional

    Get a professional opinion if:

    • You have horizontal cracks in any foundation wall (structural issue)
    • You see bowing or inward movement of the wall
    • Seepage is widespread across multiple walls
    • The water entry is at or near the footing level

    See our guide to hiring a waterproofing contractor and what fair prices look like in your region.

  • How to Tell If Your Basement Has a Water Problem: 12 Warning Signs

    How to Tell If Your Basement Has a Water Problem: 12 Warning Signs

    Most basement water problems don’t announce themselves with a flood. They start subtle — a musty smell, a white powder on the wall, a small damp patch after rain. By the time homeowners notice, the damage has often been building for months or years.

    This guide covers the 12 most reliable warning signs that your basement has a moisture or water intrusion problem — and what each one tells you about the underlying cause.

    Why Early Detection Matters

    Water damage compounds. A small crack that leaks a quart of water per rain event will widen over time as freeze-thaw cycles expand it. Mold begins growing on wet surfaces within 24–48 hours. Wood rot can compromise floor joists within 1–2 years of sustained moisture exposure. Catching problems early reduces repair costs by 60–80% in most cases.

    The 12 Warning Signs

    1. Efflorescence (White Chalky Deposits)

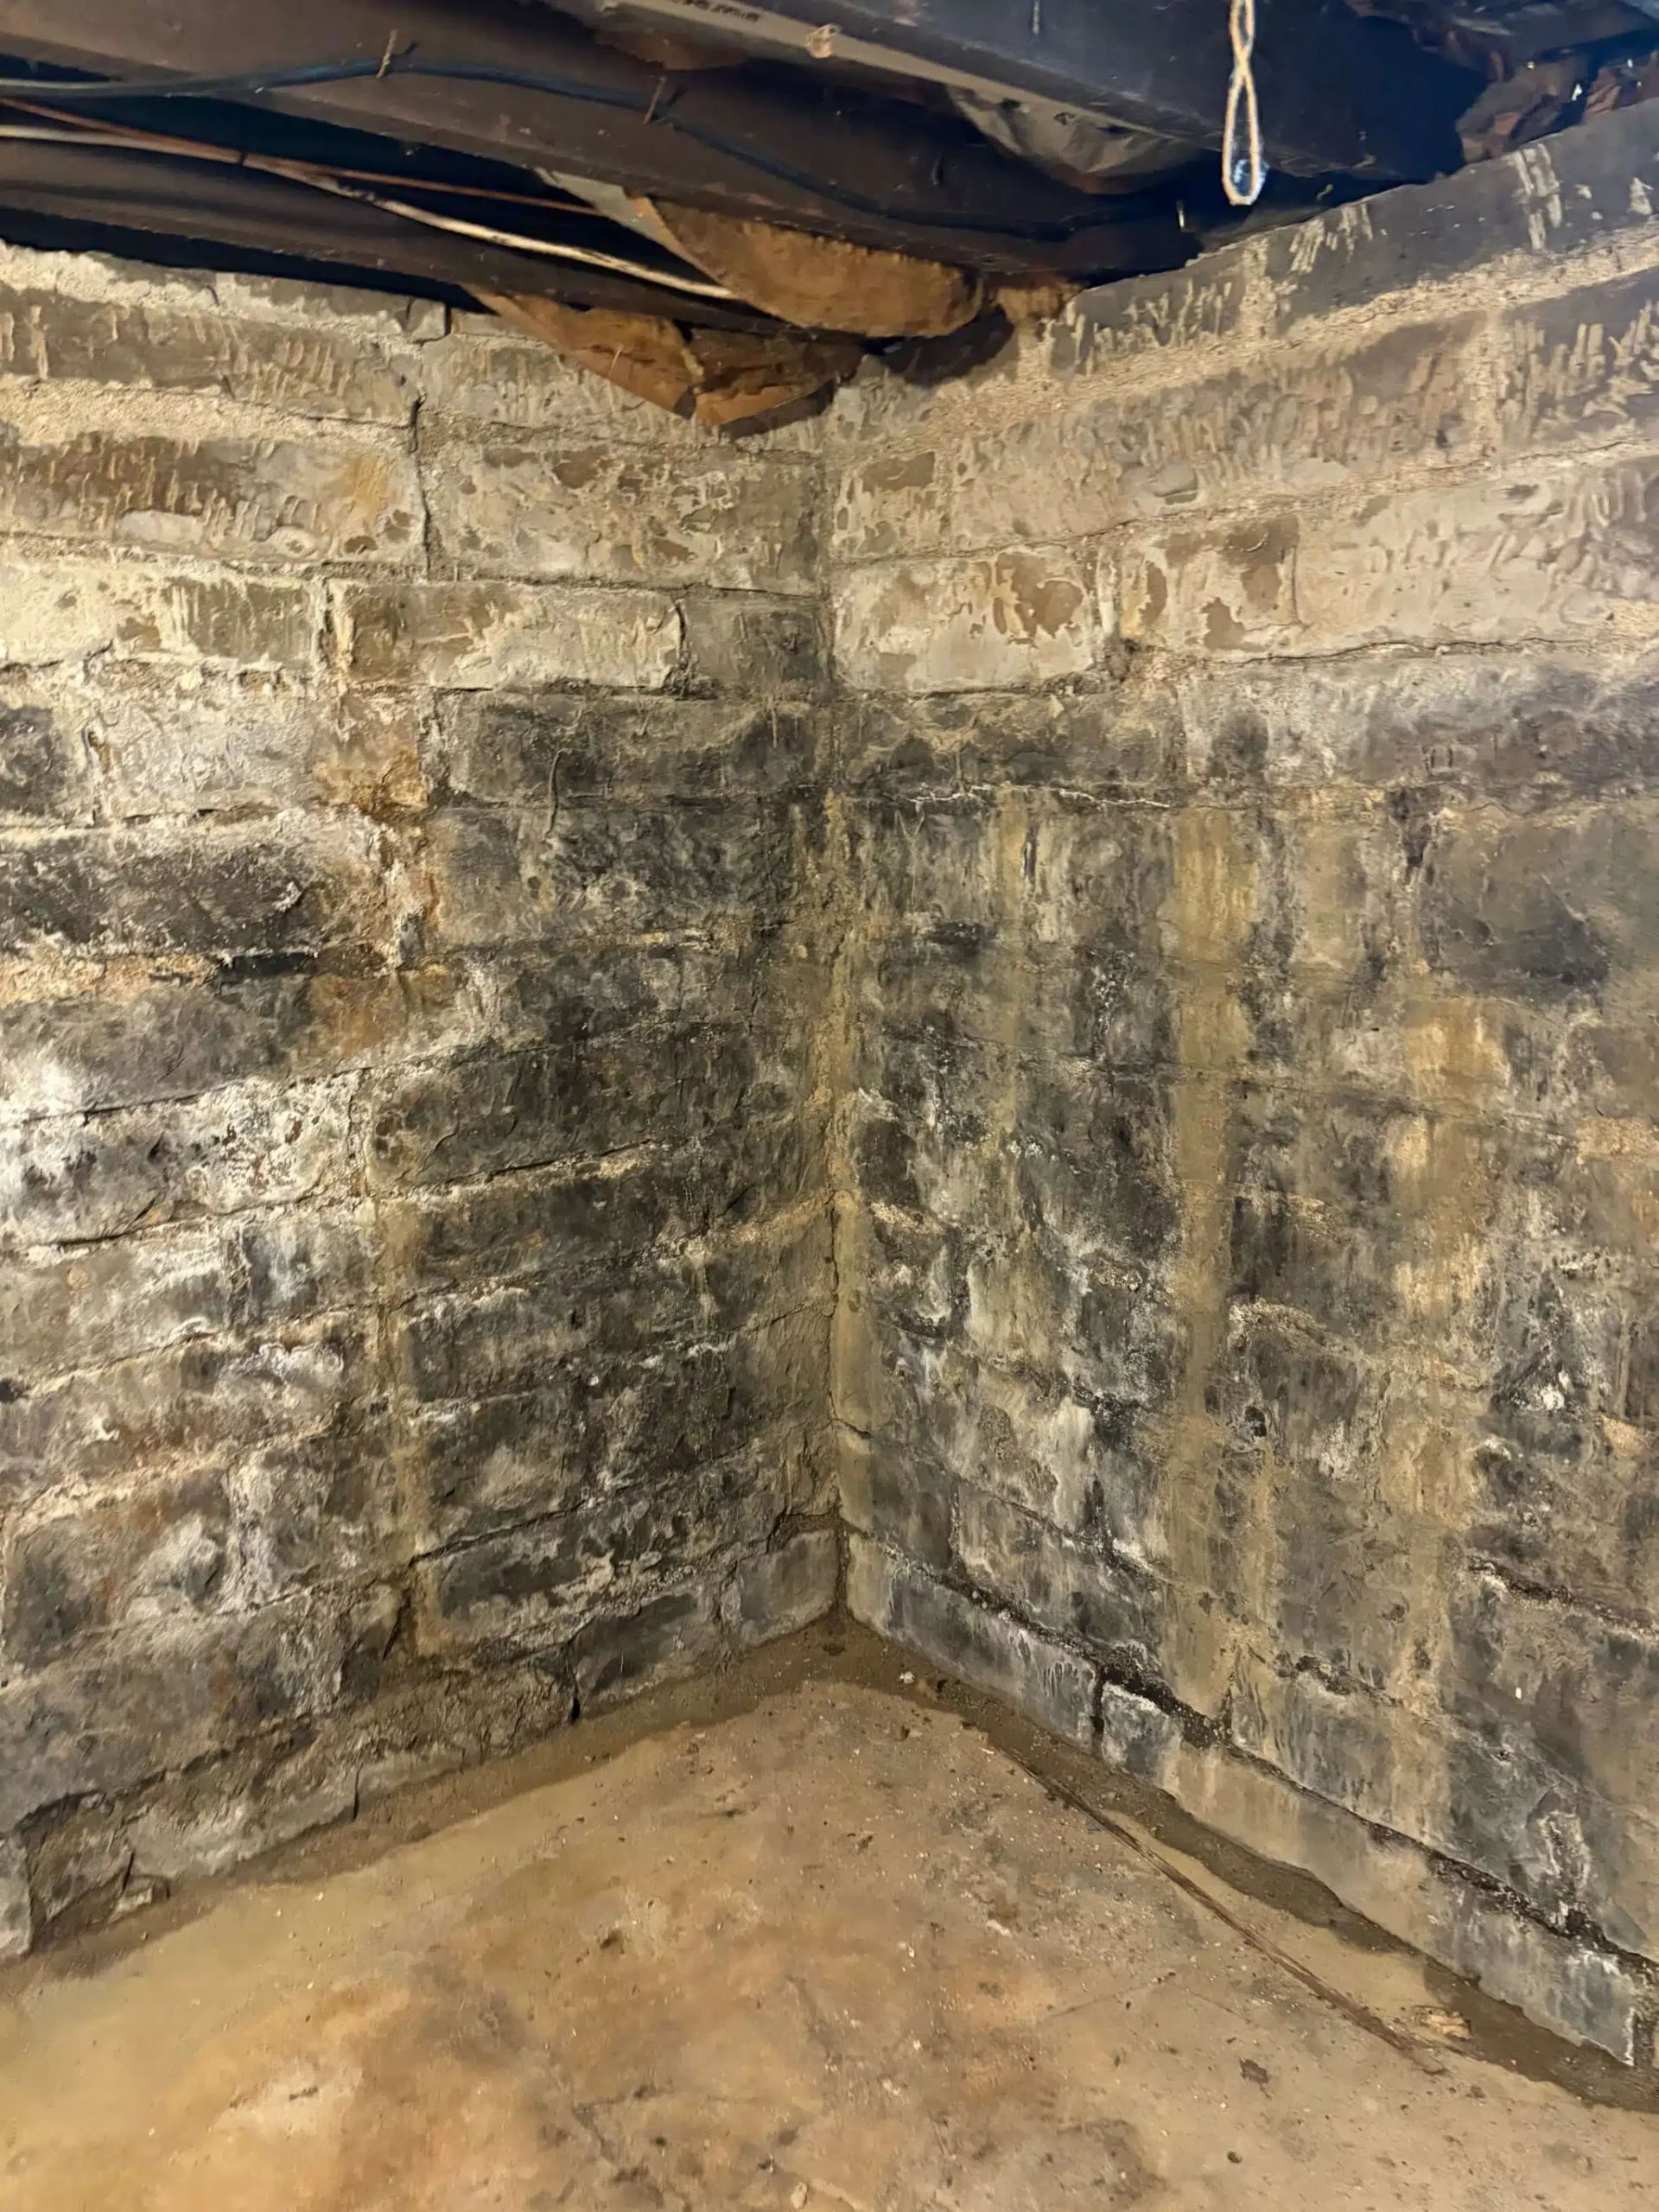
    Efflorescence is the white or gray chalky crust that forms on concrete or block walls. It’s caused by water carrying dissolved minerals (calcium, magnesium, sodium) through the wall. When the water evaporates, the minerals crystallize on the surface.

    What it tells you: Water is passing through your foundation wall. The wall itself is porous or cracked. This is a reliable indicator of hydrostatic pressure from soil on the outside.

    Severity: Low to moderate. Efflorescence itself doesn’t cause structural damage, but it confirms active water movement through the wall that needs to be addressed.

    2. Musty or Earthy Odor

    That classic “basement smell” is actually the odor of mold, mildew, and organic material decomposing in a high-moisture environment. You can’t see mold yet, but if you smell it, it’s there — likely behind drywall, under carpet, or in the insulation.

    What it tells you: Relative humidity in your basement is consistently above 60–70%, enabling mold growth. The source could be wall leaks, floor seepage, condensation, or poor ventilation.

    3. Staining on Walls or Floor

    Brownish or rust-colored stains at or near the base of foundation walls typically indicate water entry at the wall-floor joint — the most common point of entry in poured concrete basements. The stain pattern tells you a lot:

    • Horizontal stain line at a consistent height → past flooding to that level
    • Vertical streak → crack in the wall above
    • Stain around a window well → window well drainage failure
    • Stain at the cove joint (where wall meets floor) → hydrostatic pressure seepage

    4. Peeling Paint or Blistering

    Paint blisters and peels when moisture vapor pushes through the wall from the exterior. This happens even when the wall looks and feels dry to the touch — the moisture is vapor, not liquid water. Basement walls painted with standard interior paint are especially prone to this.

    Important note: Applying more paint on top of peeling basement paint is not a fix. Waterproofing paint like Drylok can slow vapor transmission but won’t solve an active leak.

    5. Cracks in Walls or Floor

    Not all cracks are equal. Here’s how to read them:

    Crack TypeWhat It MeansUrgency
    Hairline vertical crackNormal concrete shrinkageMonitor
    Diagonal crack (45°) from cornerDifferential settlementModerate
    Horizontal crackLateral soil pressure — structural issueHigh — call a pro
    Stair-step crack in block wallMortar joint failure, settlementModerate to High
    Crack with water seeping throughActive water intrusionHigh

    6. Rust Stains Around Floor Drains or Pipes

    Rust stains around floor drains can indicate that the drain is backing up or that water is flowing through it more than it should. Rust around pipe penetrations through the foundation wall suggests water is getting in at those entry points.

    7. Damp or Wet Spots After Rain

    If you notice damp patches or puddles that appear within 12–24 hours of heavy rain, you have an active exterior water issue — poor grading, clogged gutters, or failed window well drains. This is the most direct sign, and also the most actionable: fix the drainage problem first before any interior waterproofing.

    8. Condensation on Walls or Pipes

    Condensation happens when warm, humid air contacts a cold surface. It’s different from a wall leak — and easy to confuse. Here’s a simple test:

    The tape test: Tape a 12-inch square of plastic sheeting to a damp wall. Seal all four edges. Wait 24 hours. If moisture appears on the outside of the plastic (between plastic and room air), it’s condensation. If moisture appears behind the plastic (against the wall), it’s seepage from outside.

    Condensation alone is managed with dehumidification and ventilation. Seepage requires waterproofing.

    9. Mold or Mildew Visible Growth

    Black, green, or white fuzzy growth on walls, wood framing, or stored items is active mold. This is a serious indoor air quality issue — mold spores circulate through your HVAC system to the rest of the house. Do not disturb mold without proper protection (N95 mask minimum, gloves, eye protection). For areas larger than 10 square feet, hire a certified mold remediation contractor.

    10. Buckled or Warped Flooring

    Finished flooring — carpet, laminate, hardwood over a basement slab — that buckles, warps, or shows dark staining underneath indicates water coming up through the slab or in at the perimeter. This usually indicates a high water table or failed sump pump system.

    11. Rotting Wood (Sill Plates, Floor Joists)

    Press a screwdriver or awl into the sill plate (the wood beam sitting on top of the foundation wall) and into the floor joists nearest the foundation. If it sinks in easily, the wood is rotted. This indicates long-term high humidity or direct water contact — and it’s a structural issue that needs immediate attention from a contractor.

    12. A Sump Pump That Runs Constantly

    A sump pump that cycles on and off frequently — or runs almost continuously — during or after rain indicates significant groundwater intrusion. The pump is handling the water, but it’s working hard. You should:

    • Confirm the pump discharges water away from the house foundation (not back toward it)
    • Install a battery backup sump pump — a power failure during a storm could flood your basement within hours
    • Consider whether your drainage system is adequate for your water table situation

    What to Do After Identifying the Signs

    After identifying which warning signs apply to your basement:

    1. Photograph everything — document stains, cracks, and mold for insurance and contractor quotes
    2. Check the outside first — confirm gutters are clear, downspouts extend 6+ feet from the foundation, and the ground slopes away from the house
    3. Do the tape test on any damp walls to distinguish condensation from seepage
    4. Get 3 contractor quotes before any work — waterproofing pricing varies enormously

    Next Steps

    Once you’ve identified the signs, the next step is understanding what’s causing them — and which solution fits your situation. Read our guides on DIY basement waterproofing options, interior drainage systems, and how much basement waterproofing costs.