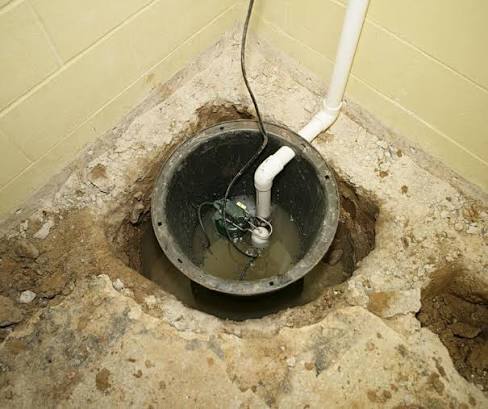
A sump pump that fails during a heavy storm is one of the most expensive home failures a homeowner can experience — thousands in water damage from a pump that costs $200 to replace. Regular maintenance catches 90% of failures before they happen. Here is exactly what to do and when.
How Often to Test Your Sump Pump
- Once a month: Quick pour test (30 seconds)
- Every spring: Full maintenance inspection before rainy season
- After every major storm: Verify pump cycled and pit is draining
- Every 3–5 years: Professional inspection or pump replacement
Monthly Quick Test
This takes less than a minute. Pour a 5-gallon bucket of water slowly into the sump pit. The pump should activate before the water level reaches the float arm and should drain the pit within 1–2 minutes. If the pump doesn’t turn on, doesn’t turn off, or takes more than 3 minutes to drain a standard pit, it needs attention.
Annual Spring Maintenance Checklist
Step 1: Check the Power Source
- Confirm the pump is plugged into a dedicated GFCI outlet
- Test the GFCI by pressing the Test and Reset buttons
- Check that the cord is not pinched, frayed, or sitting in standing water
- If you have a battery backup, test the backup unit (disconnect main power and pour water)
Step 2: Inspect the Pit
- Remove the pit cover and check for debris, dirt, or gravel that has migrated into the pit
- Clean any debris with a wet/dry vacuum — debris can clog the intake screen
- Check the pit walls for cracks or erosion
Step 3: Inspect the Pump
- Lift the pump out of the pit (unplug first)
- Clean the intake screen at the bottom of the pump with a garden hose
- Check that the float is not tangled, stuck, or coated with debris
- Inspect the impeller (the spinning fan inside) for wear or debris — a screwdriver can free most obstructions
- Lower the pump back into the pit, ensuring it sits level
Step 4: Check the Discharge Line
- Trace the discharge pipe from the pump to where it exits the foundation
- Verify the pipe pitches consistently downward (no sags that trap water)
- Confirm the exterior discharge point is at least 10 feet from the foundation
- Check the check valve — a functioning check valve prevents water from flowing back into the pit when the pump stops
- Clear any debris or ice blockage at the exterior outlet (critical in winter)
Step 5: Test the Float and Switch
- Manually lift the float to verify the pump activates immediately
- For vertical float switches, check that the switch moves freely up and down without binding on the pump body
- For tethered float switches, verify the tether is the correct length (too short = pump runs constantly; too long = pit overflows)
When to Replace Your Sump Pump
| Warning Sign | Likely Cause | Action |
|---|---|---|
| Pump runs but doesn’t drain pit | Worn impeller or clogged intake | Clean intake; if problem persists, replace |
| Pump runs continuously | Float stuck on / too low / high water table | Adjust float; check for ground water issue |
| Pump never turns on | Failed motor, tripped breaker, bad float | Test float manually; check outlet |
| Loud grinding or rattling noise | Debris in impeller or failing bearings | Clean impeller; replace if noisy after cleaning |
| Pump is 7+ years old | Normal wear | Proactive replacement (don’t wait for failure) |
Battery Backup: The Most Important Upgrade
Pumps fail most often during the storms that cause flooding — precisely when power outages happen. A battery backup sump pump system ($200–$500) is the single most valuable upgrade for any basement with water issues. A backup pump typically runs on a 12V marine battery and activates automatically when the primary pump fails or power goes out.
For help choosing a replacement pump or battery backup, see our 2026 sump pump buyer’s guide. If you are building out a full system, our interior drainage guides explain how the drain system feeds into the sump pit.
Leave a Reply